安裝VS在MAC(實作)
安裝code
打開VS Code,按住(Cmd+Shift+P),並在以下視窗輸入
>shell command
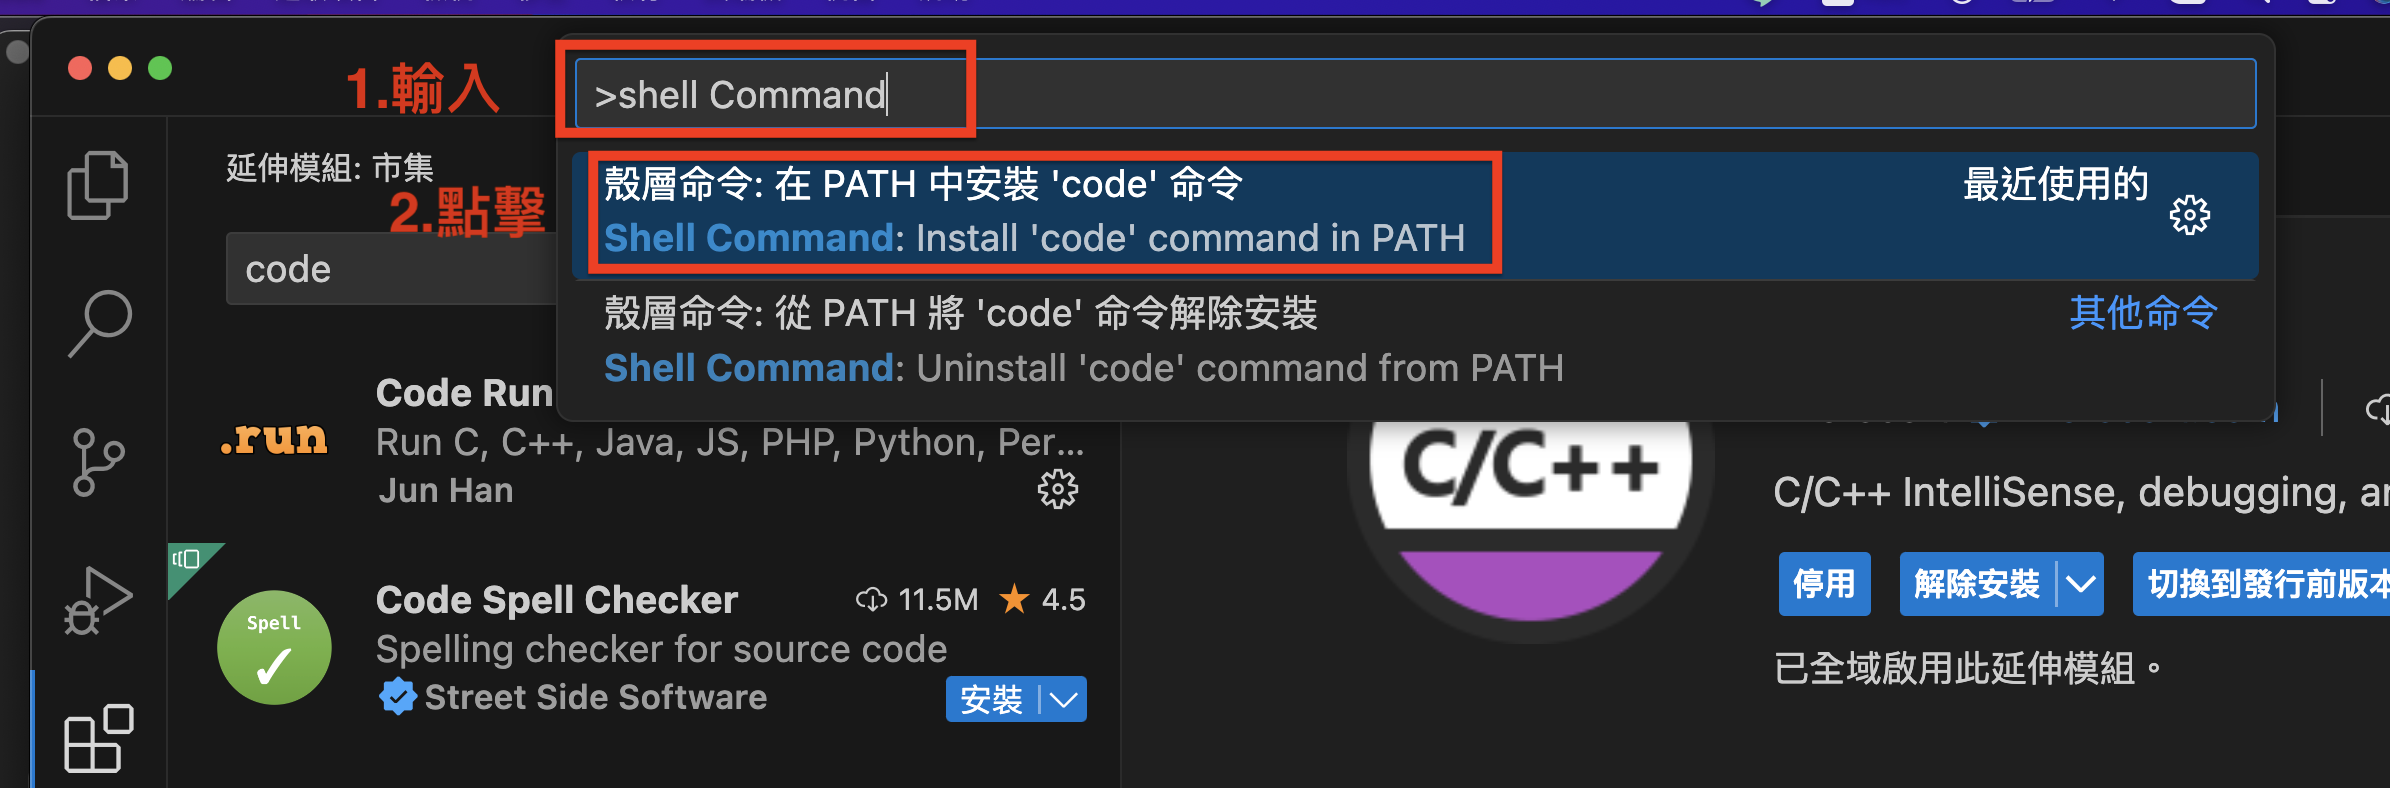
安裝成功會顯示以下畫面。

安裝clang
打開VS Code,按住(⇧⌘X),會出現延伸模組視窗。
並輸入c++
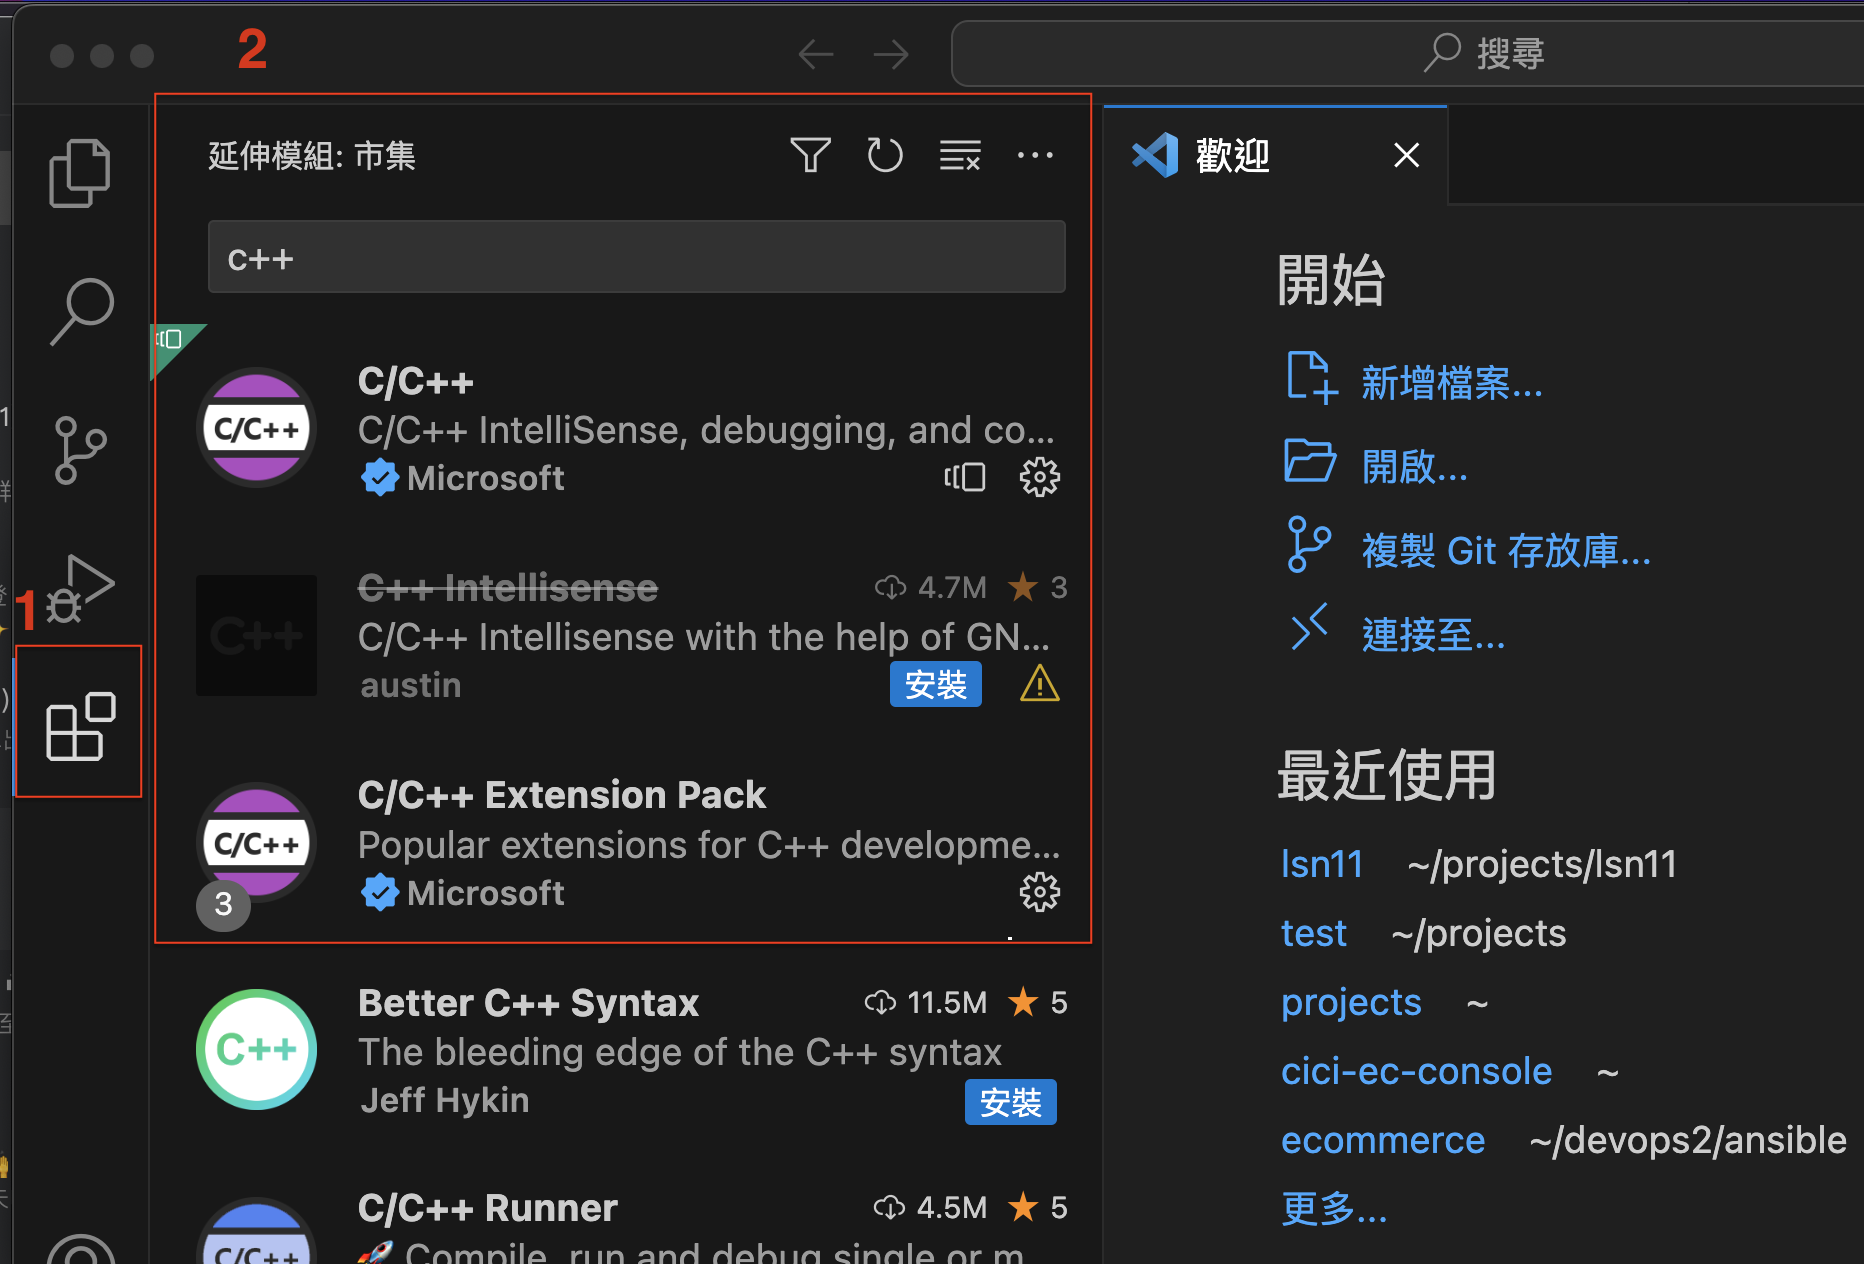
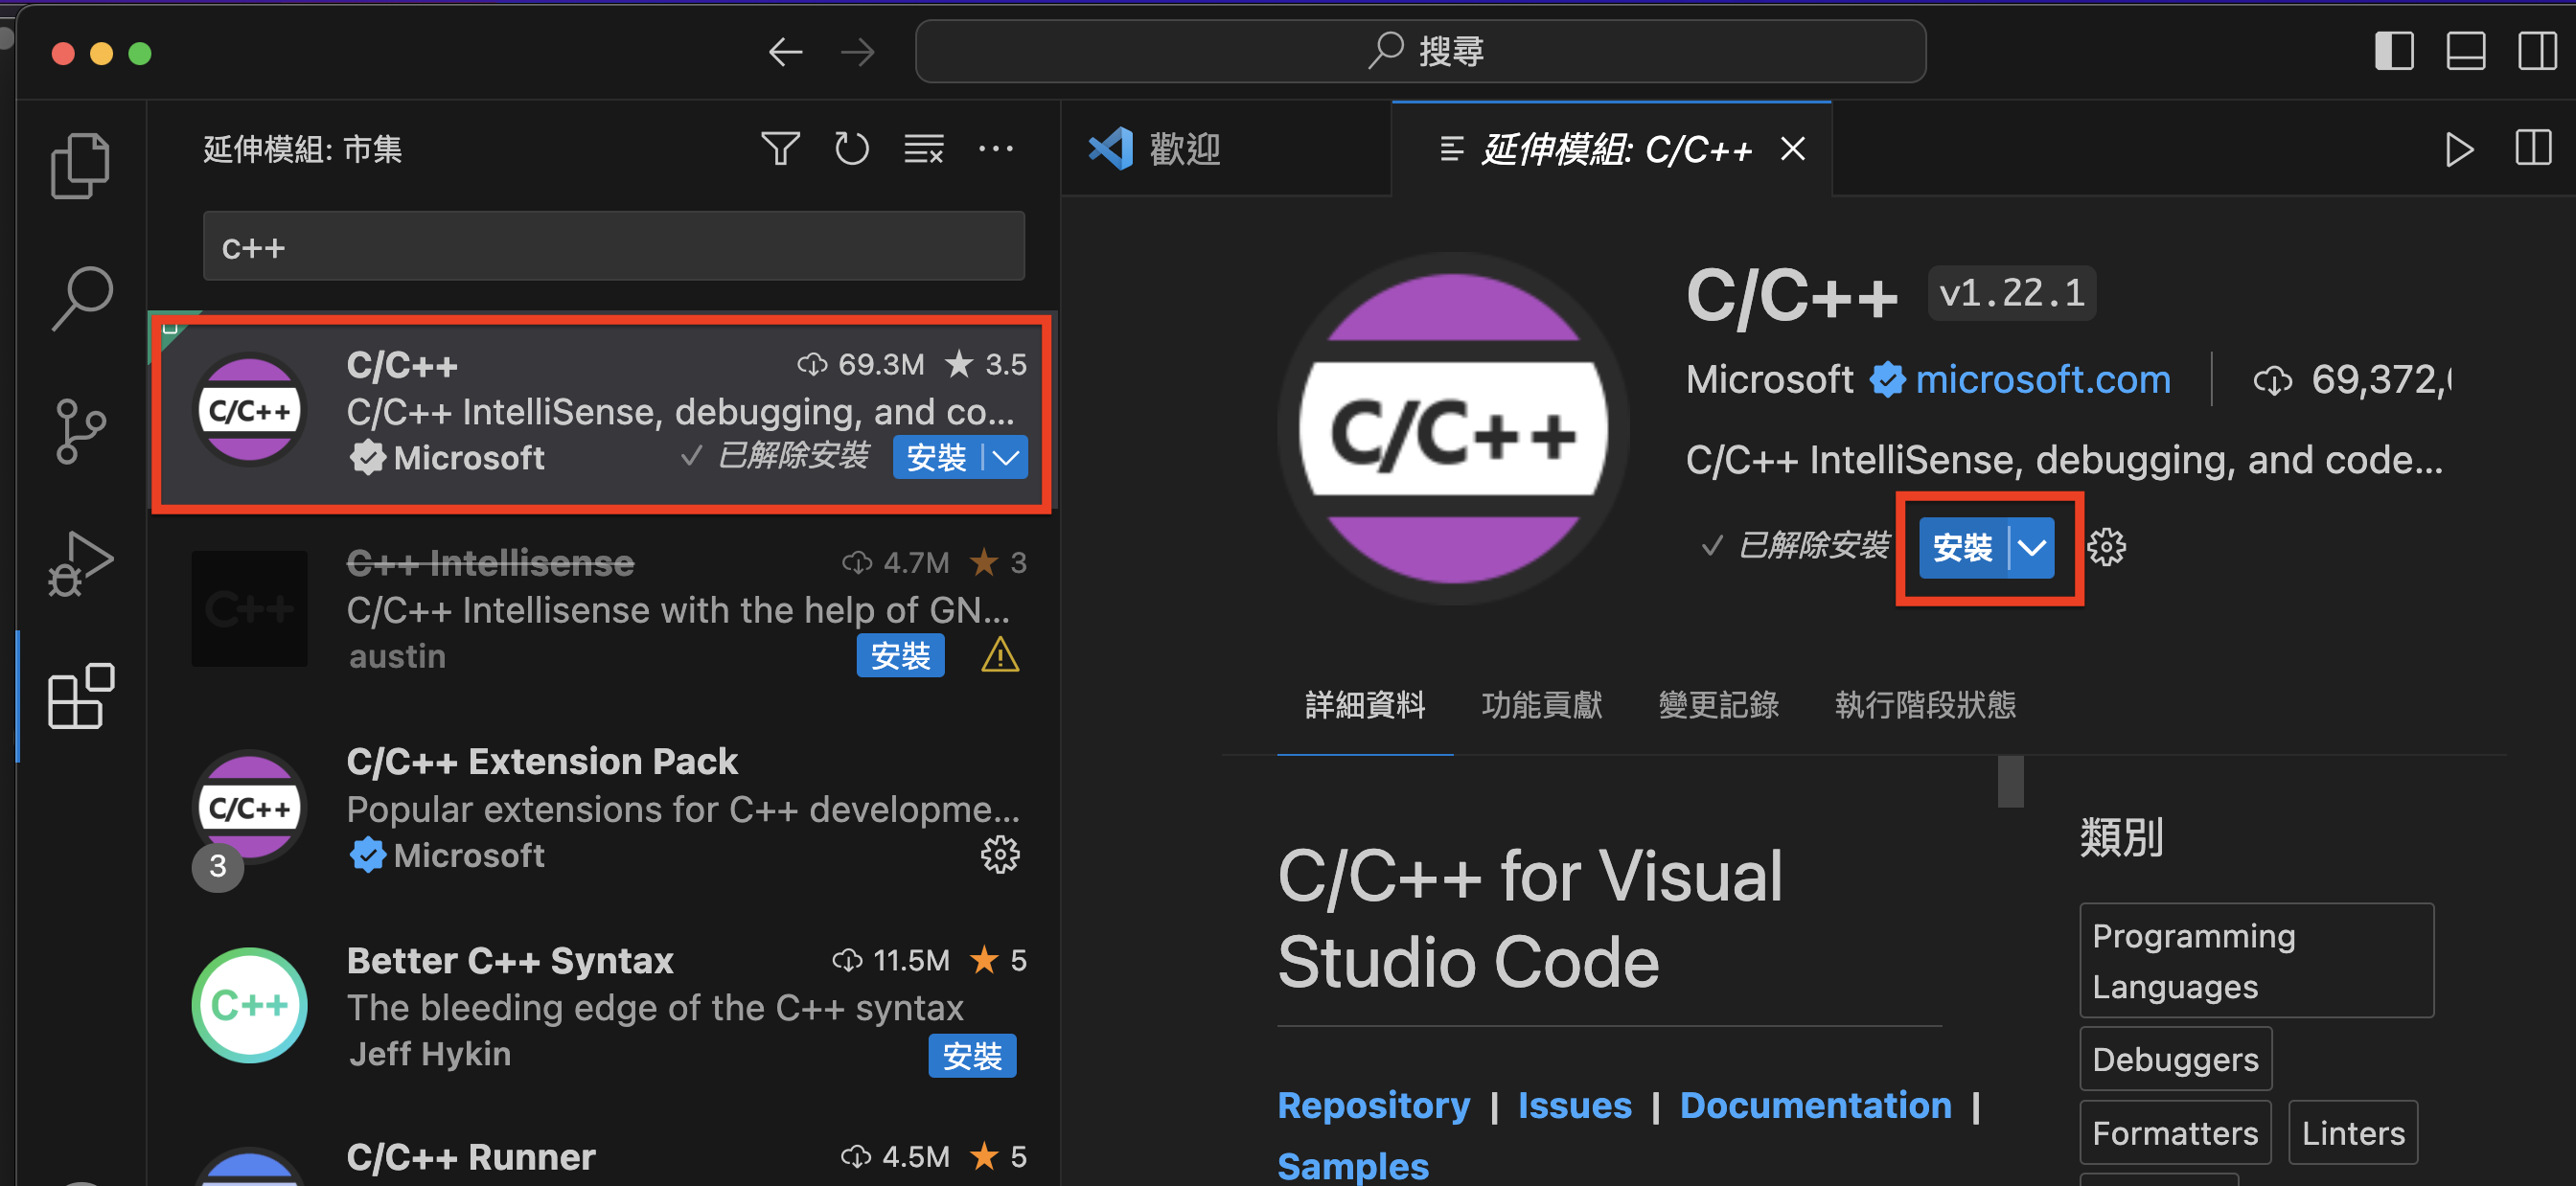
選擇C/C++,並安裝
修改 ~/.bash_profile
打開終端機,輸入以下指令。
vi ~/.bash_profile
在最下方複製貼上以下內容。
# Add Visual Studio Code (code)
export PATH="\$PATH:/Applications/Visual Studio Code.app/Contents/Resources/app/bin"
儲存離開。
在終端機再繼續輸入以下指令
source ~/.bash_profile
修改 ~/.zprofile
在終端機再輸入以下指令。
cat << EOF >> ~/.zprofile
# Add Visual Studio Code (code)
export PATH="\$PATH:/Applications/Visual Studio Code.app/Contents/Resources/app/bin"
EOF
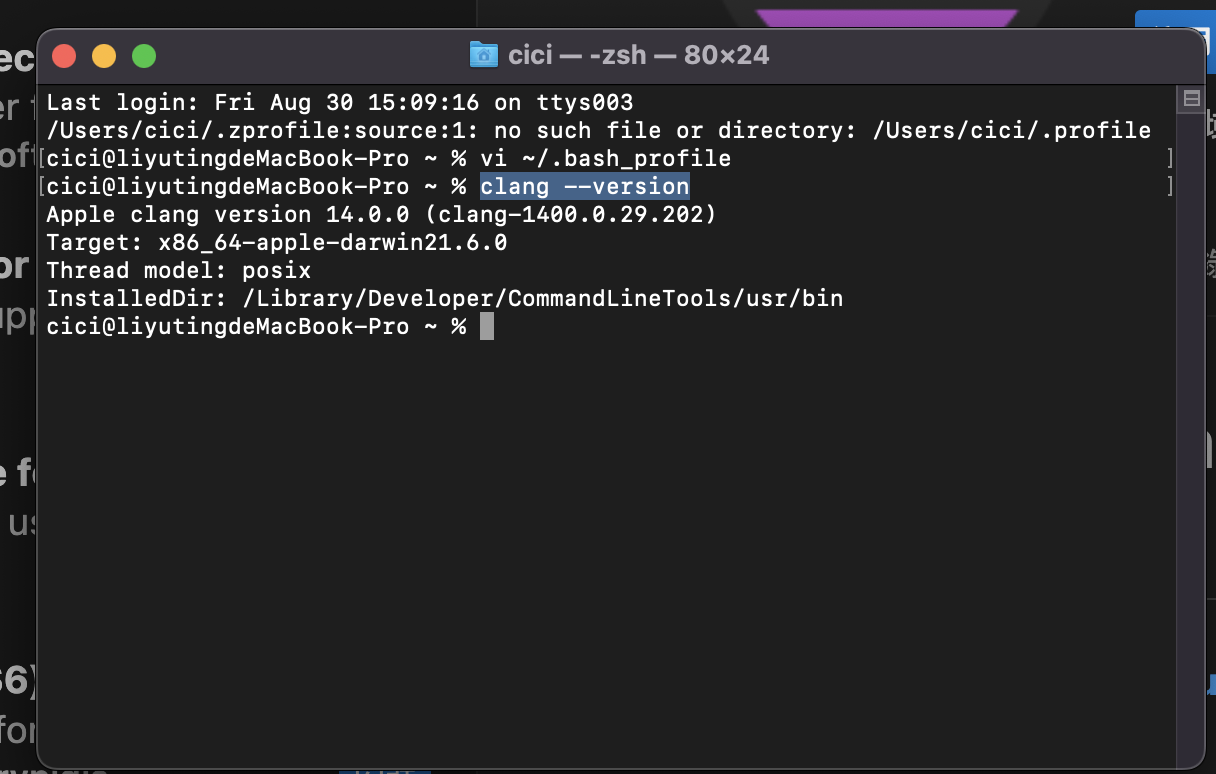
檢查clang version
將終端機重開,輸入以下指令
clang --version
要確保出現如下圖示。
code .
從終端機進入自建放程式碼的目錄,並在終端機輸入以下指令。
code .

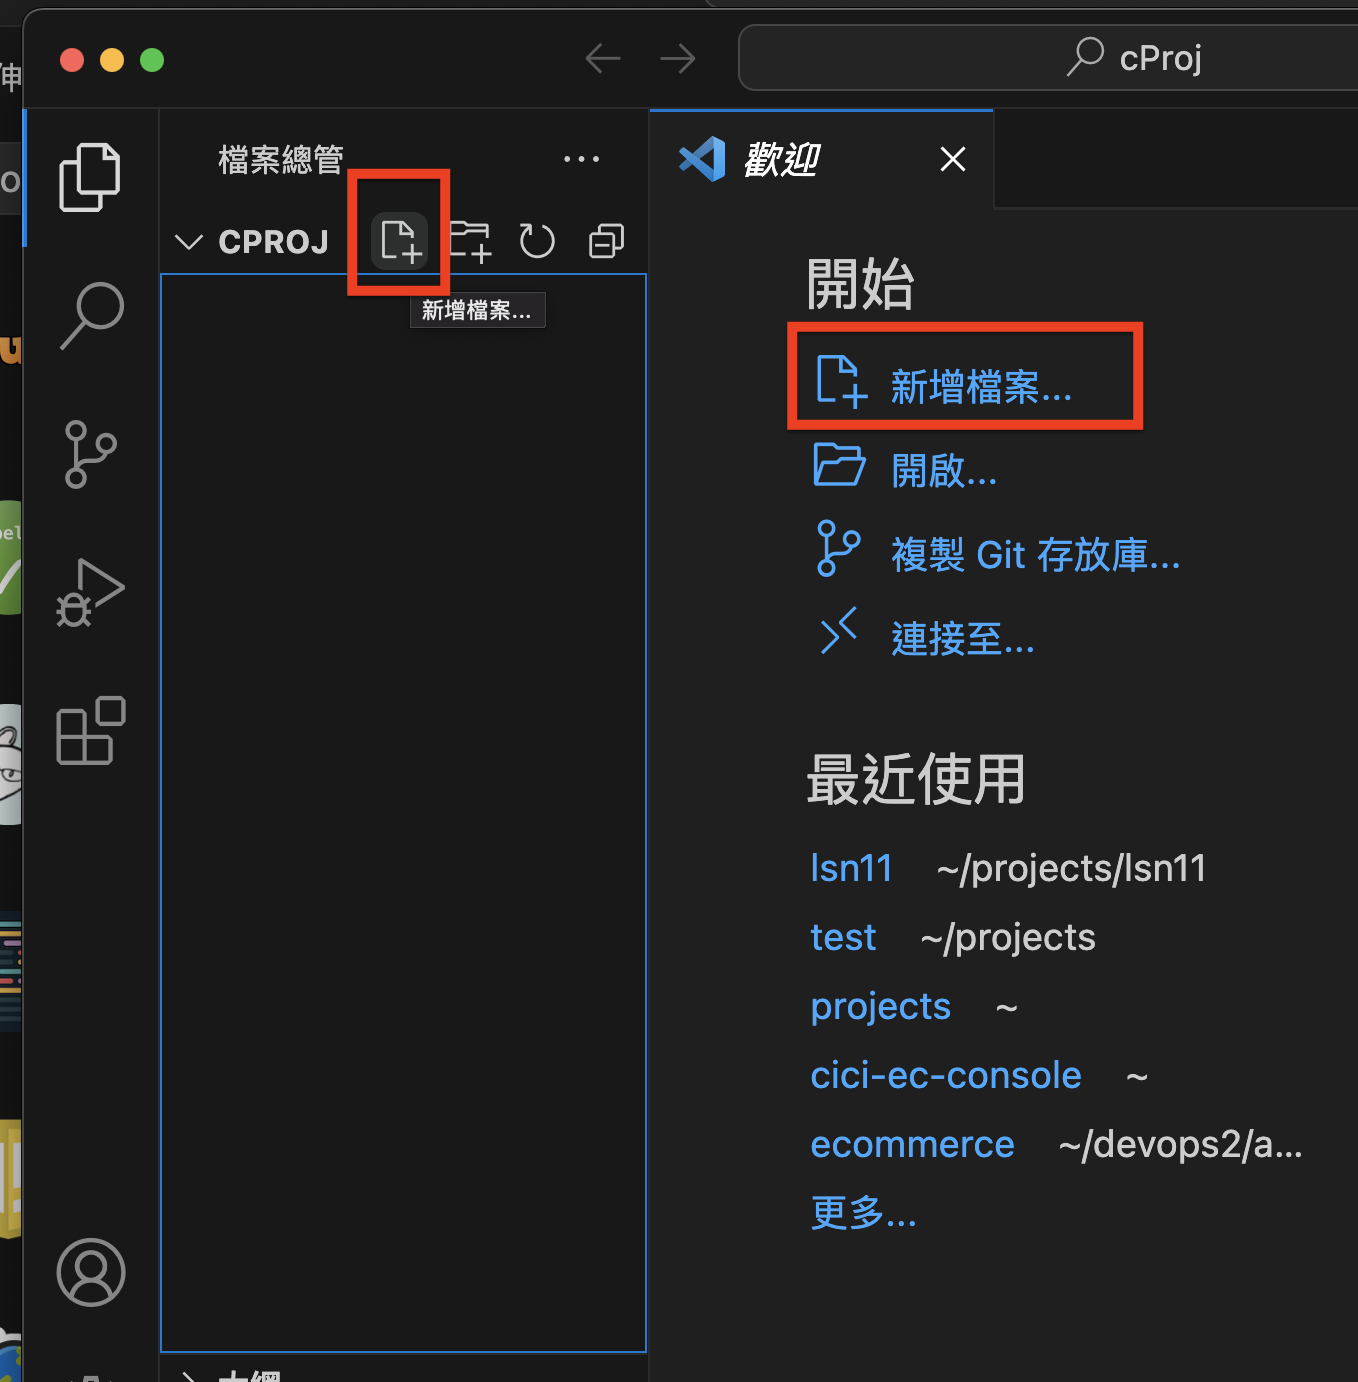
建立檔案
點擊新增檔案
命名為helloword.cpp,並將以下程式碼貼上
1
2
3
4
5
6
7
8
9
10
11
12
13
14
15
16
#include <iostream>
#include <vector>
#include <string>

using namespace std;

int main()
{
    vector<string> msg {"Hello", "C++", "World", "from", "VS Code", "and the C++ extension!"};

    for (const string& word : msg)
    {
        cout << word << " ";
    }
    cout << endl;
}
執行
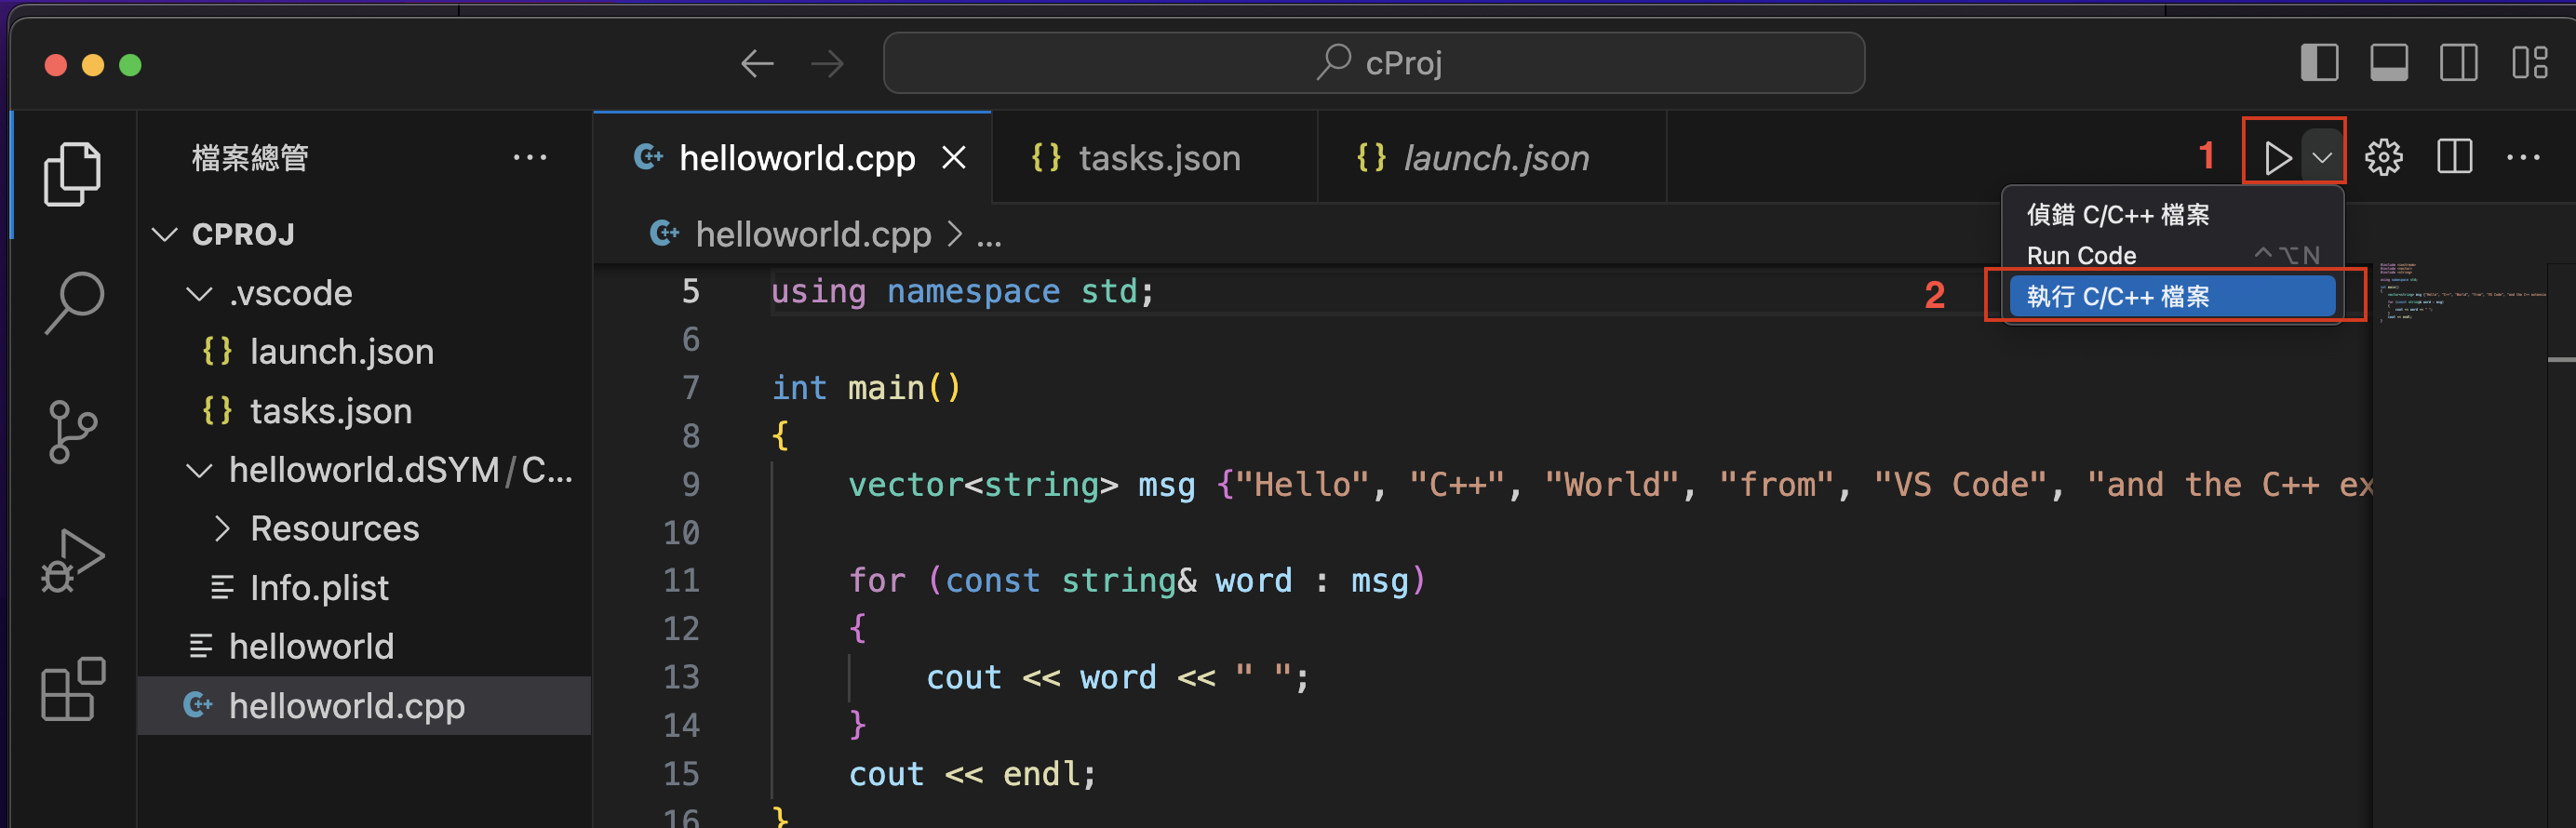
點擊圖下紅框處
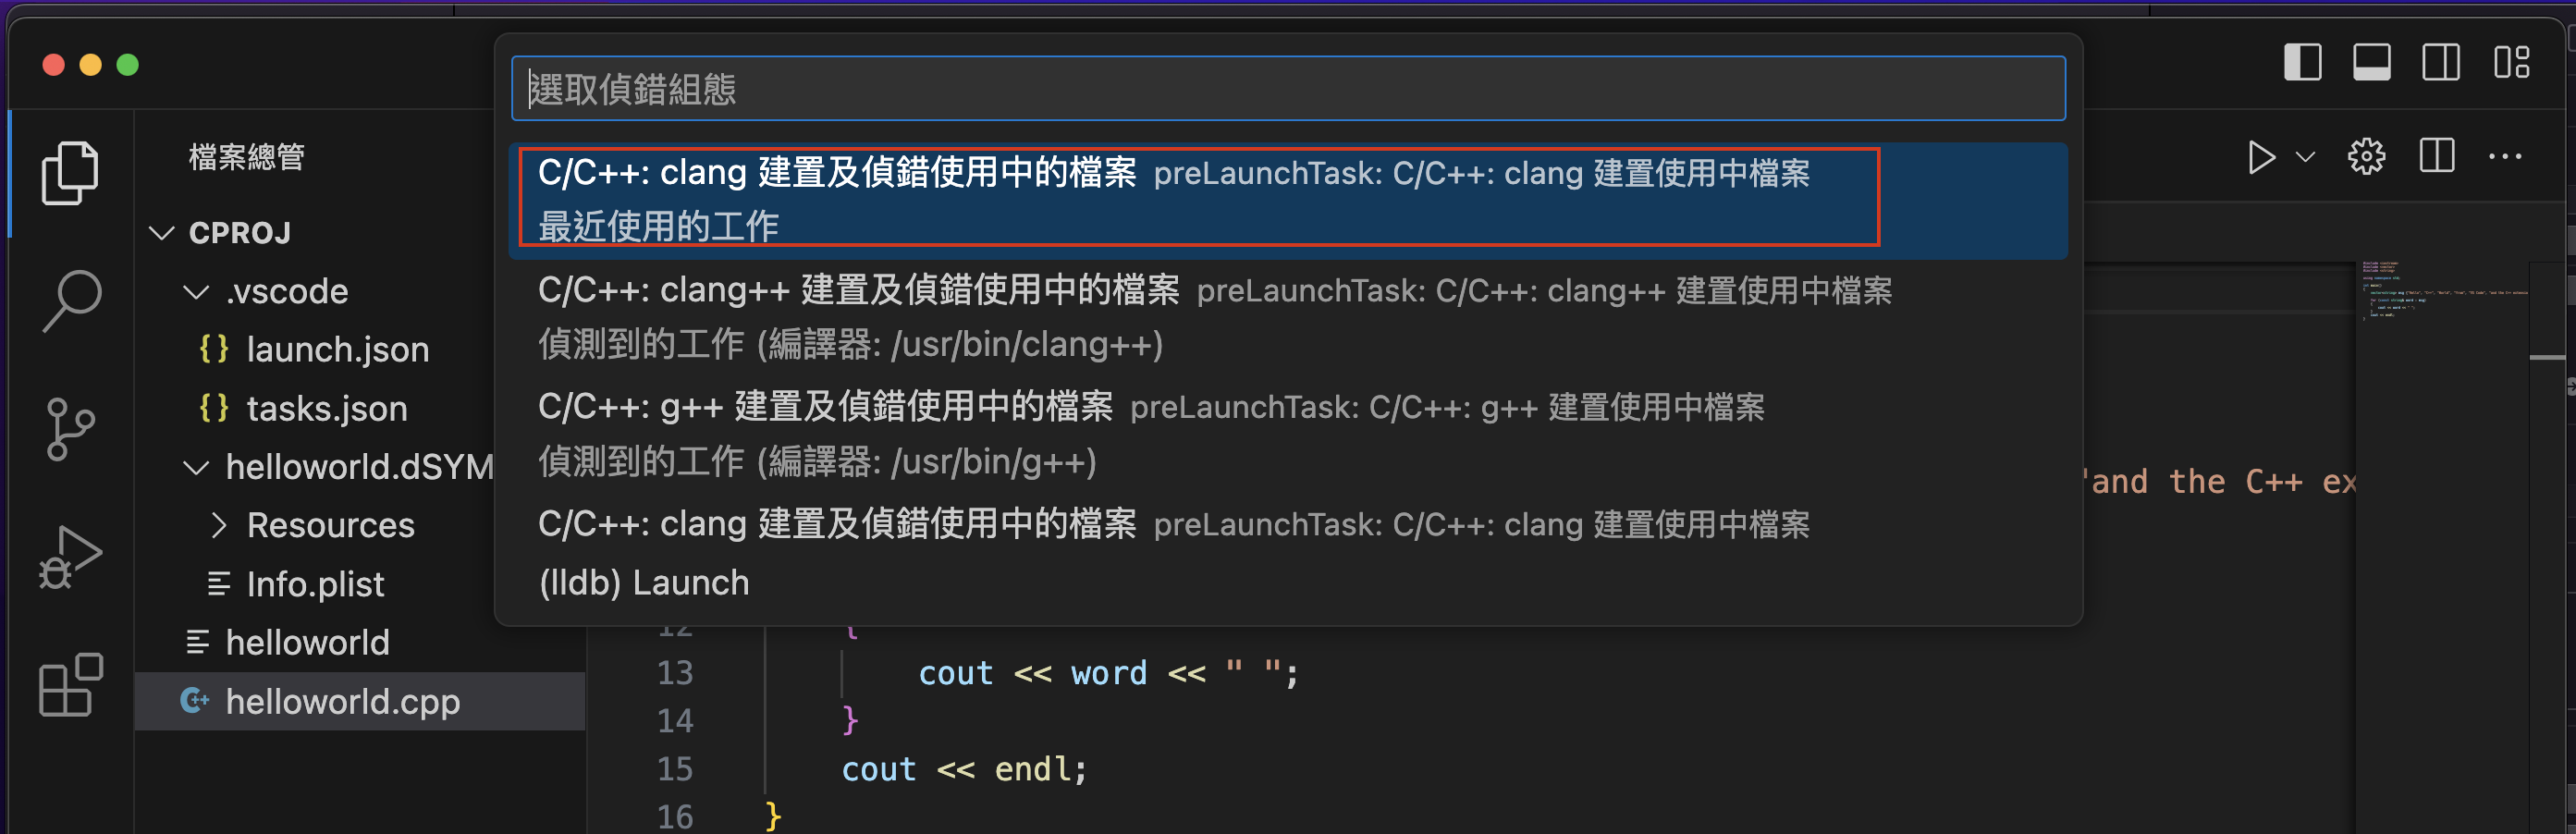
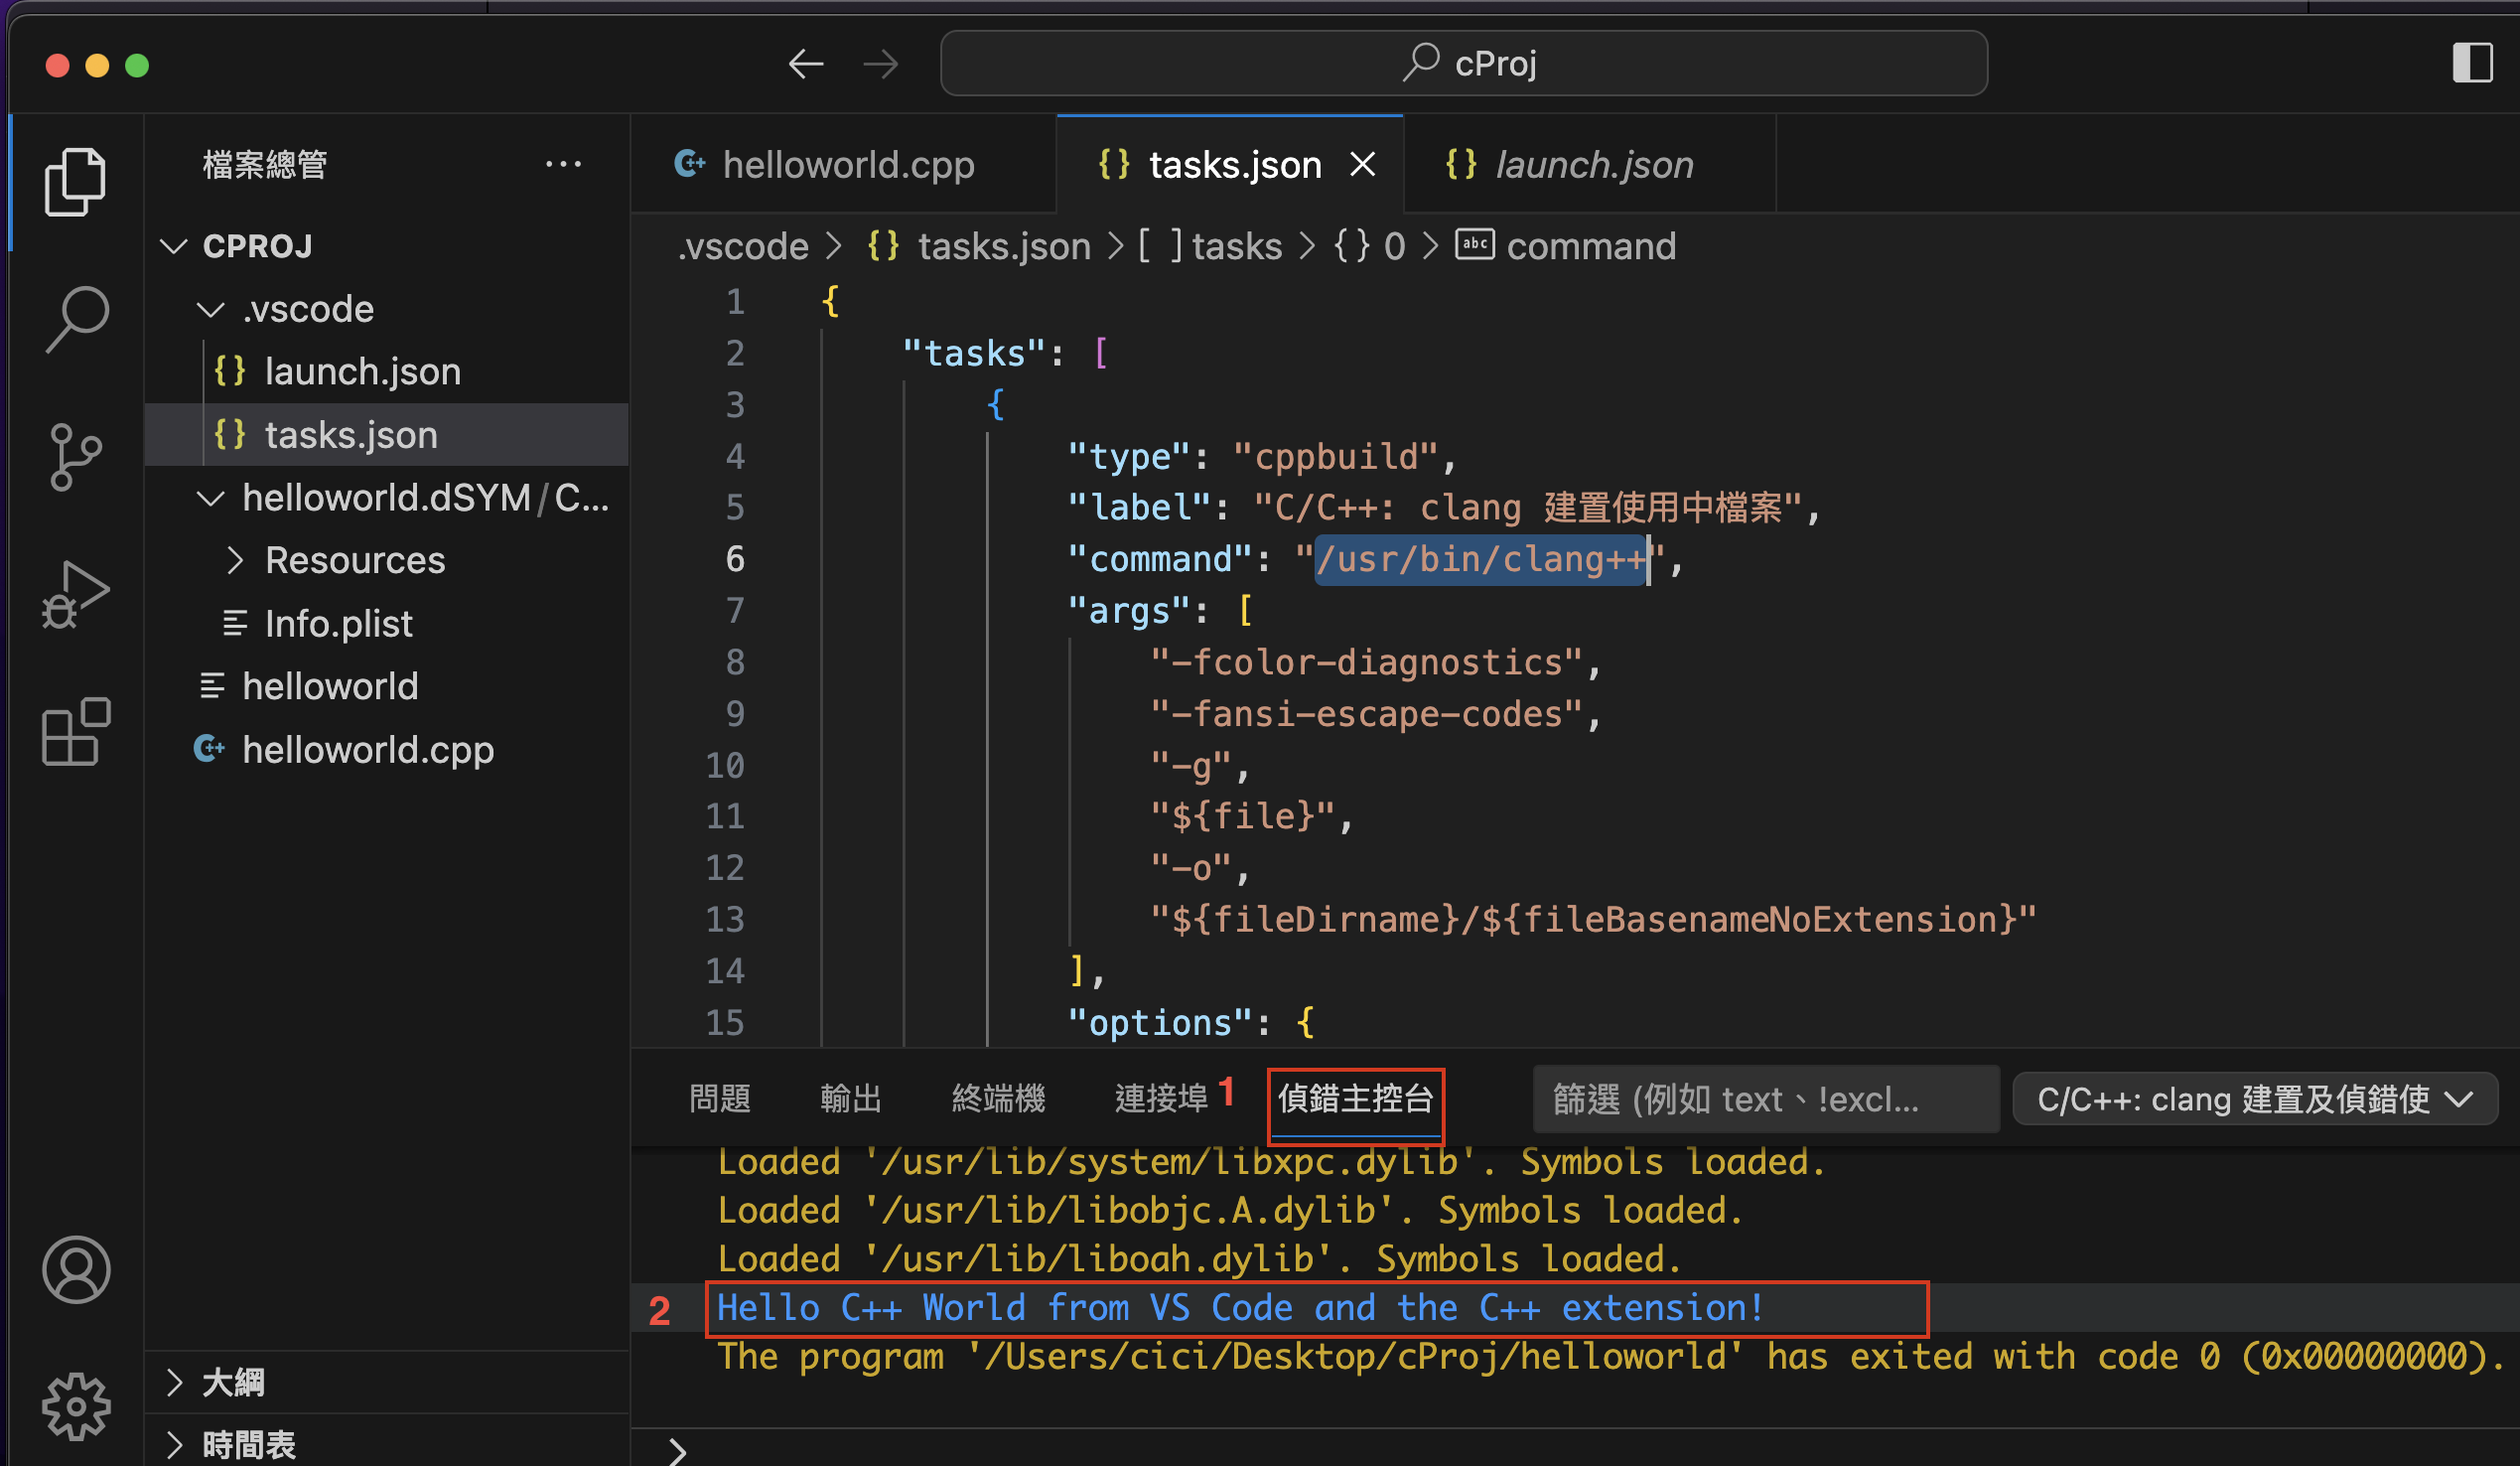
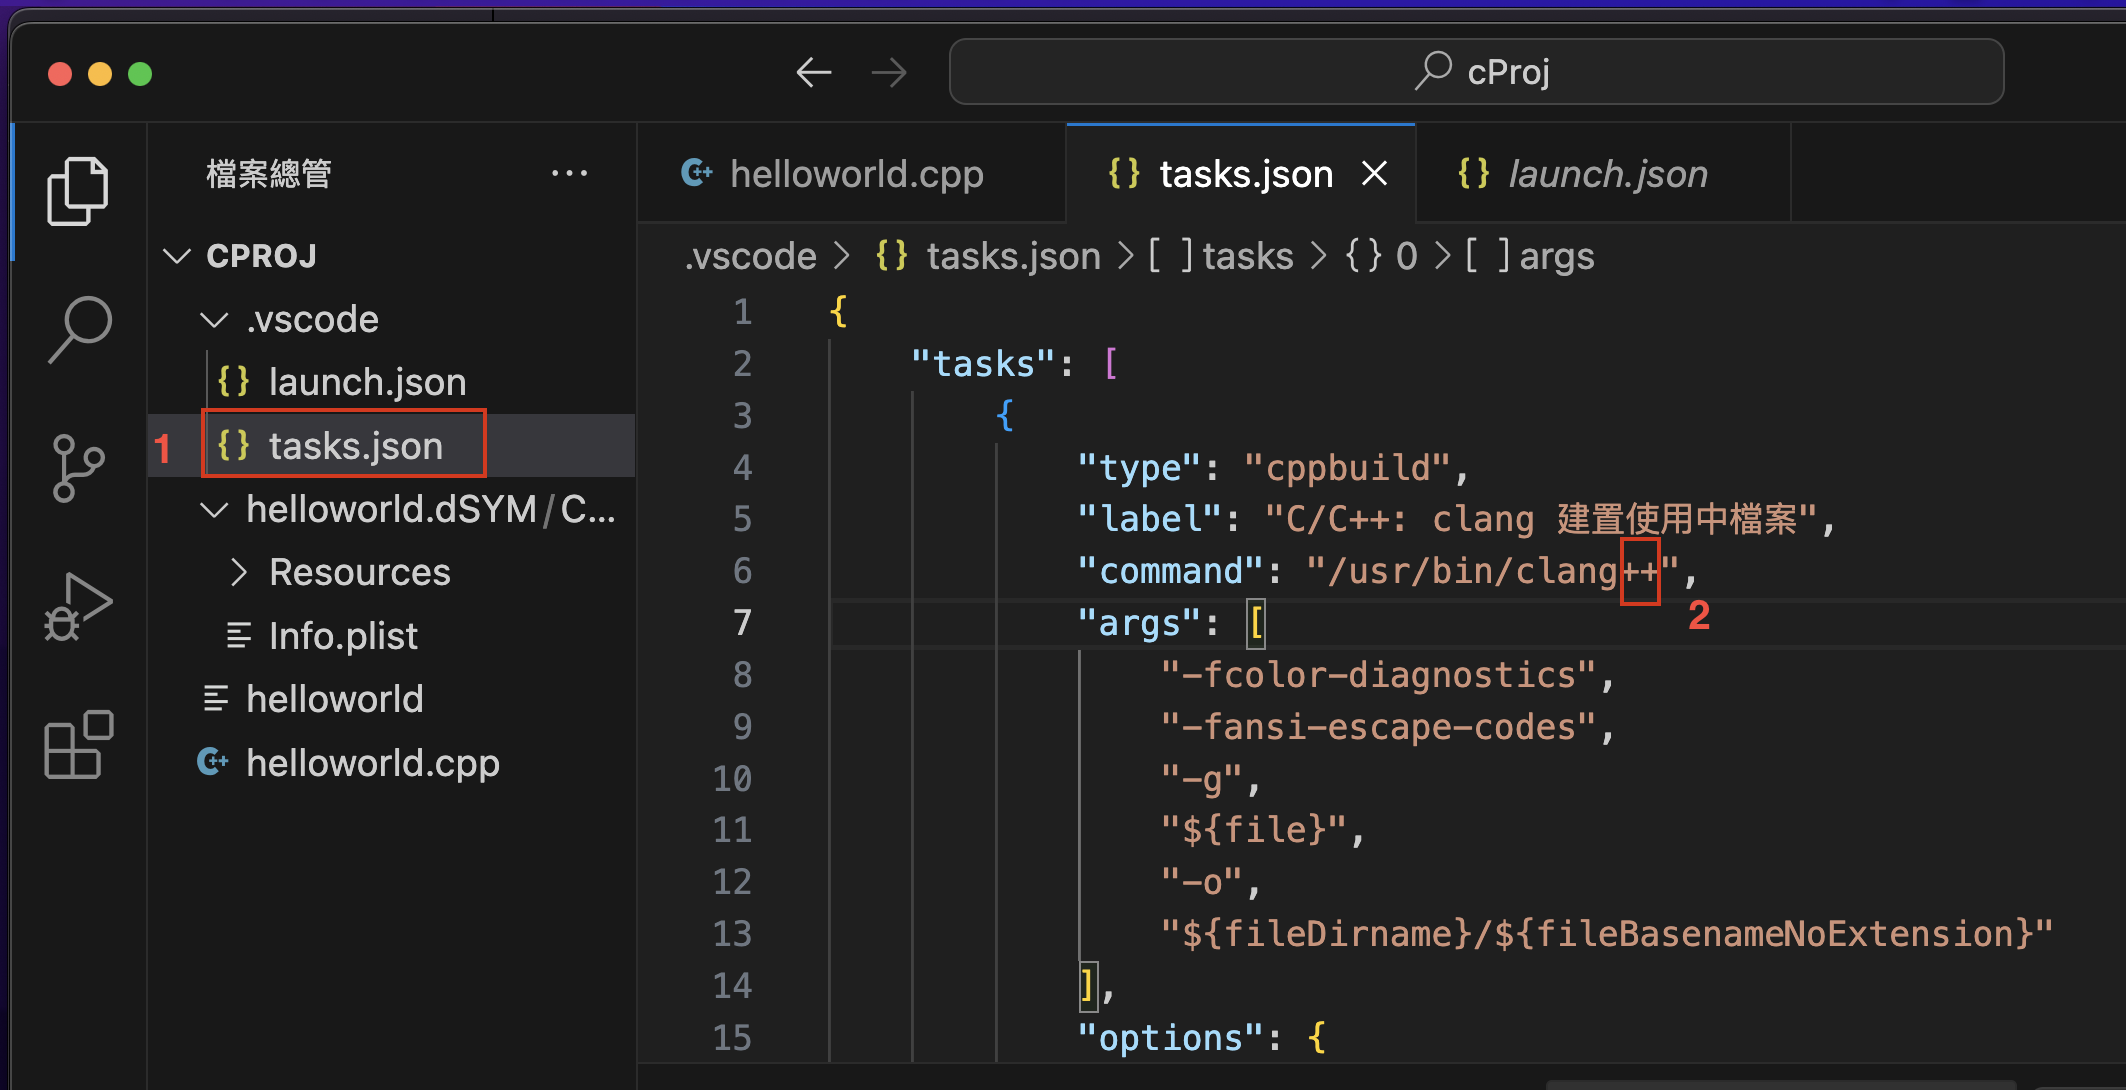
修改tasks.json
確定command的路徑為/usr/bin/clang++,點擊helloworld.cpp再執行一次。
執行結果