折線圖
以下是y軸位置
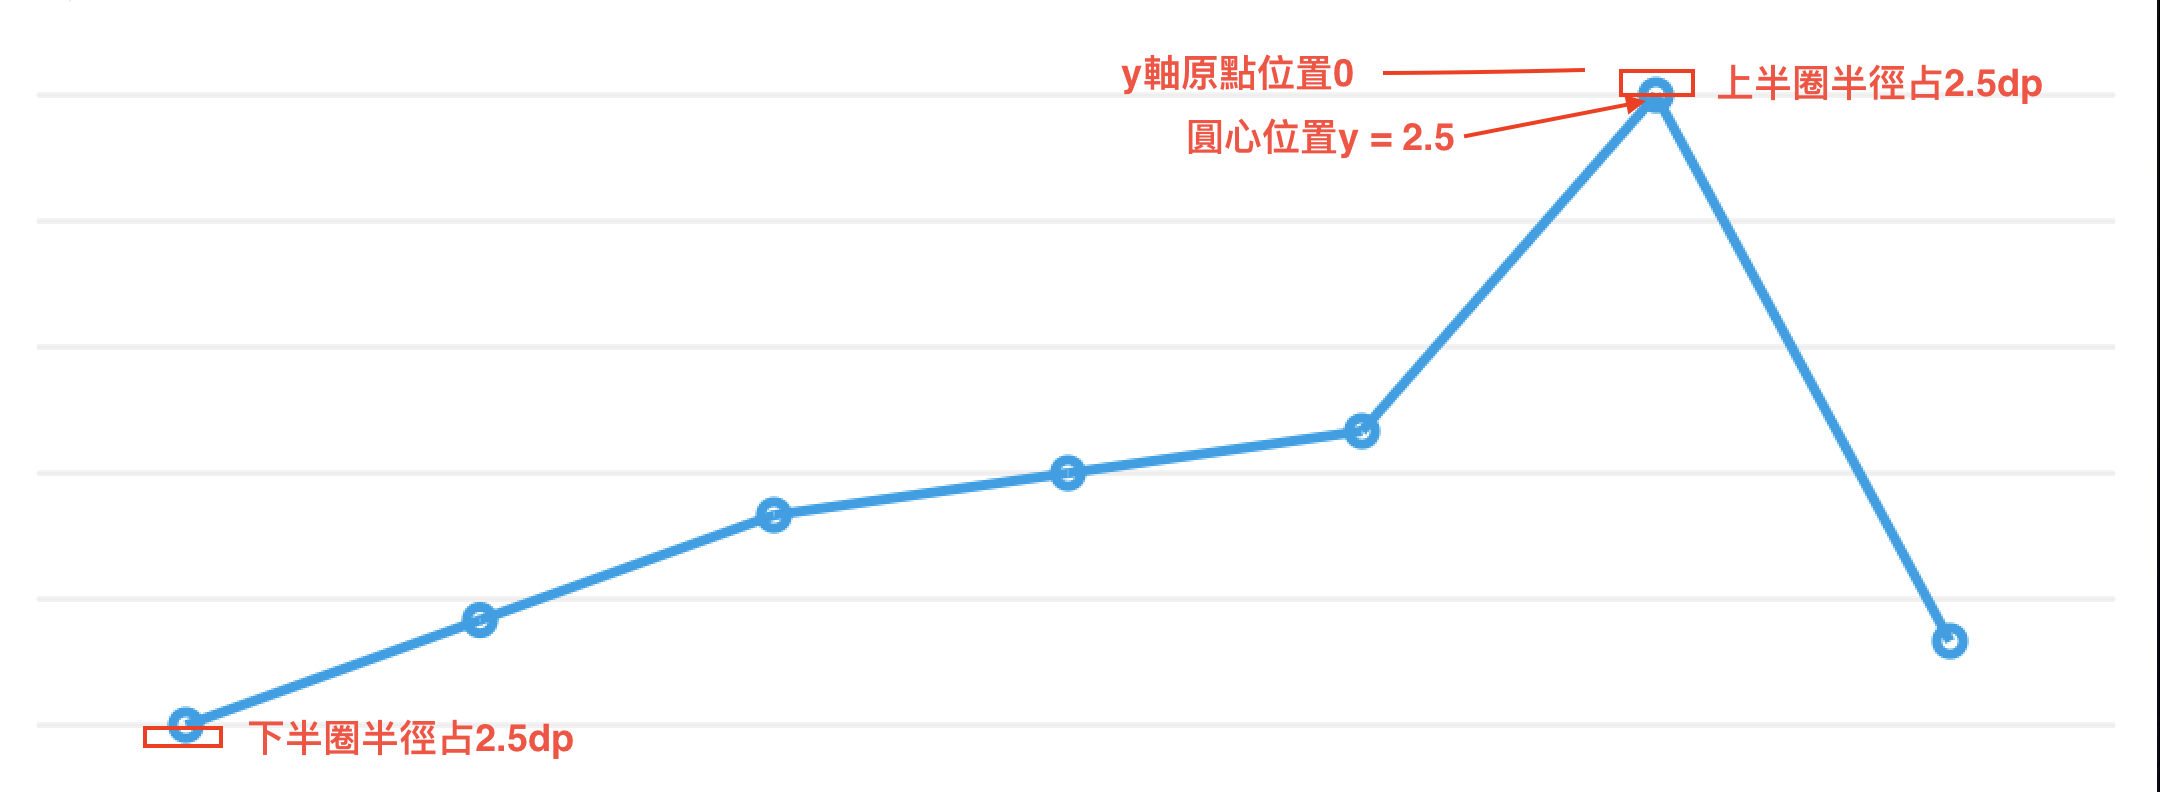
第一個圓心與y軸0有2.5的偏移量
最後一個圓心也有2.5的偏移量
原本的y軸線條位置應該是如下,中間隔24,但因為有圓心,所以y軸的線條往下偏移2.5的半徑距離
0
24
48
72
96
120
1
2
3
4
5
6
7
8
9
10
11
12
13
  //每一row的高度
  val heightForRow = 24
  //總row數
  val countForRow = 5
  //小圓圈半徑
  val circleRadius = 2.5
  //總高度
  //每一row的高度*總row數+上下小圓的半徑(因為最底會突出來小半圓,最高會突出小半圓)
  // 24 * 5 + (2.5 * 2)
  val canvasHeight = heightForRow * countForRow + (circleRadius * 2)
  //畫布寬度 = 營幕寬度 - 左邊padding - 右邊padding
  //畫布寬度 = 營幕寬度 - padding*2
  val canvasWidth = LocalConfiguration.current.screenWidthDp - (8 * 2)
先畫 畫布
1
2
3
4
5
6
Canvas(
  modifier = modifier.size(
    width = canvasWidth.dp,
    height = canvasHeight.dp
  )
) {}
產生每個直線的x,y座標,從0 .. 5開始畫6條直線
1
2
3
4
5
6
7
8
9
10
11
12
13
14
15
16
17
18
19
20
21
//畫直線
for(index in 0 .. countForRow) {
//canvas只接受px,要記得轉成px
//最底部跟最頂部有小圓半徑的大小,所以y軸的位置都要往下偏移
// 24 * index + 2.5
val y = (heightForRow * index + circleRadius).dp.toPx()
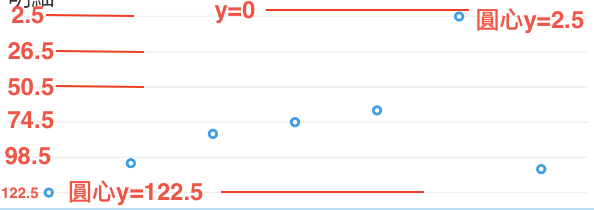
//每一個row的y值 從0的位置往下偏移2.5圓的半徑
// index 0 y = 2.5
// index 1 y = 26.5
// index 2 y = 50.5
// index 3 y = 74.5
// index 4 y = 98.5
// index 5 y = 122.5
drawLine(Color(0xFFEEEEEE),
start = Offset(0f, y), //x從0開始畫直線
end = Offset(size.width, y), //x為畫布最大寬度 size.width為直接抓到畫布的大小
strokeWidth = 2.5f,
cap = StrokeCap.Round
)
}
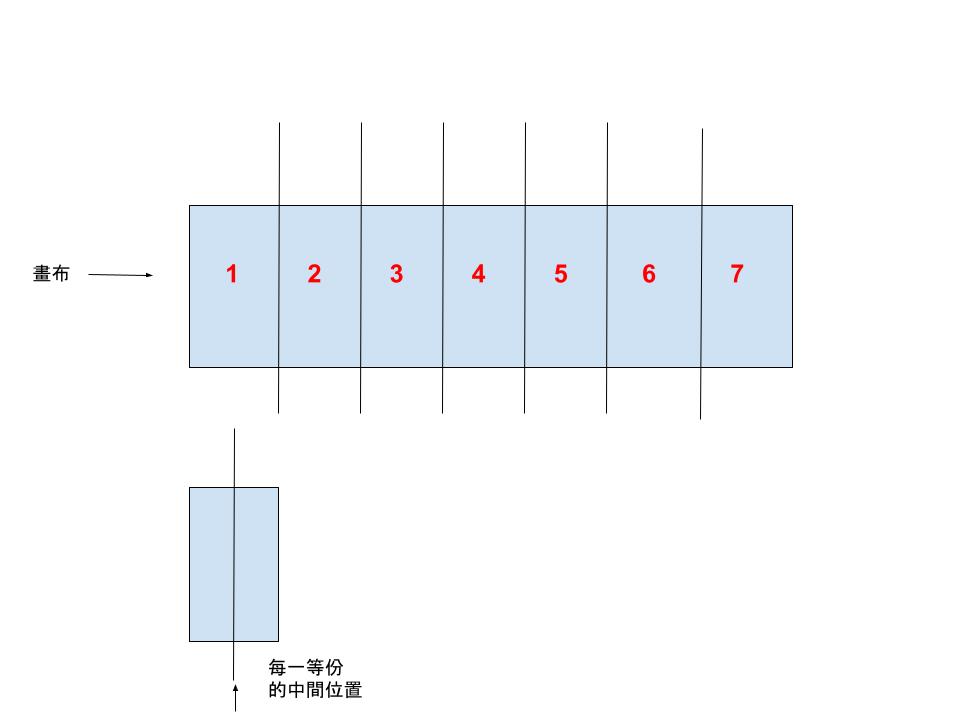
畫圓圈
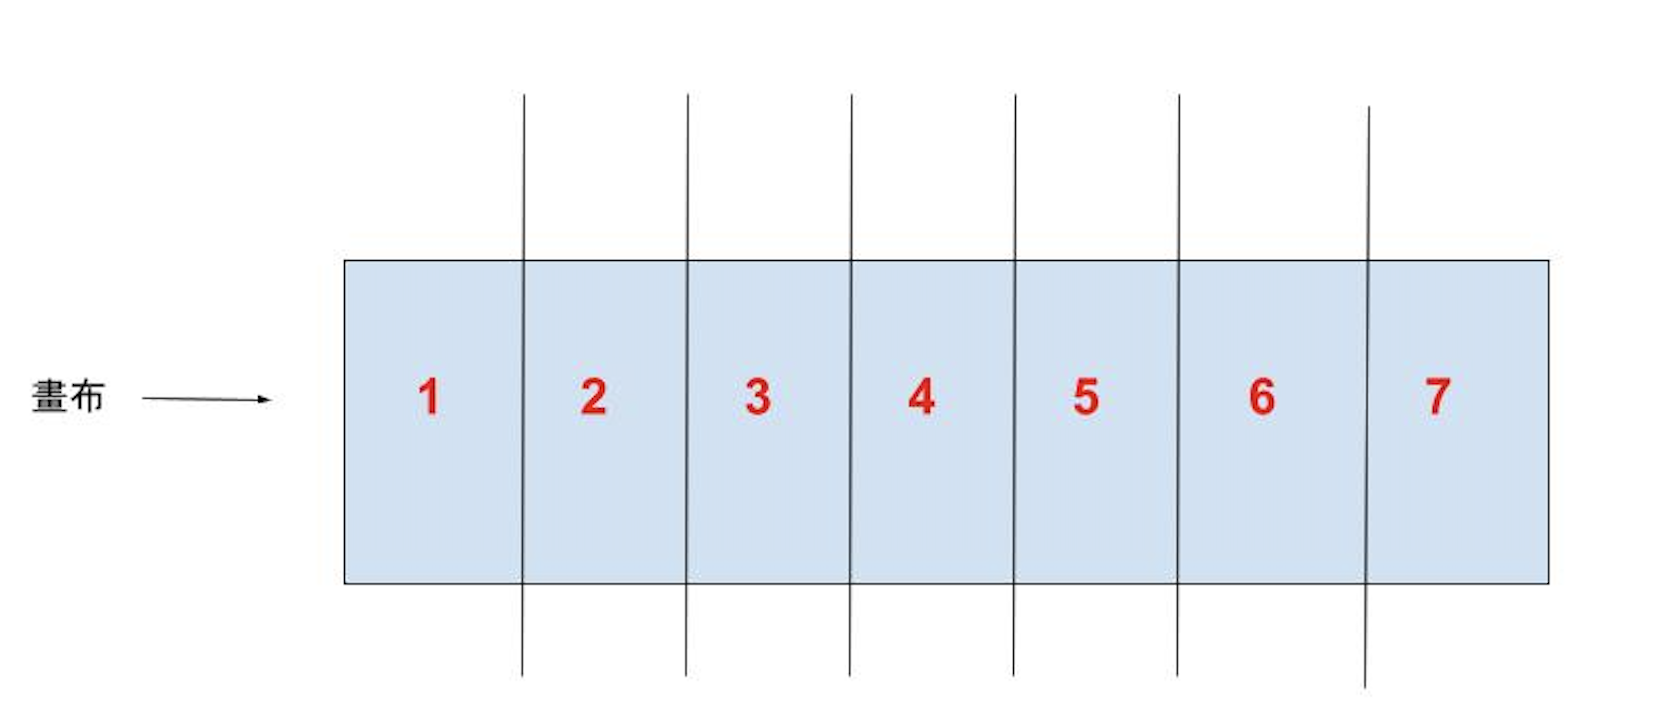
先把畫布分七等份,因一周有七天
1
2
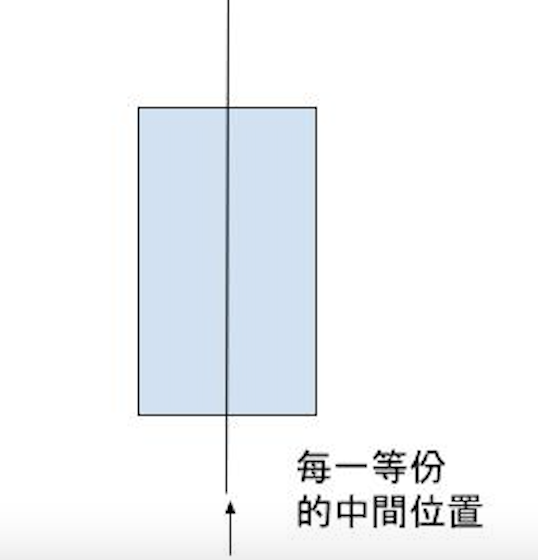
//一周有7天,要把畫布的寬度分成7等份,然後讓圓點座落在每一等份的中間位置
val averageOfWidth = canvasWidth / 7
計算每一個點的圓心
圓心的x座標
一周有7天,要把畫布的寬度分成7等份,index為第幾等份 * 平均寬度
求出每一等份的中間位置
averageOfWidth * index